
DIY Couch Table: Build Your Own Sofa Table
A custom couch table gives you extra surface space, hides clutter, and fits your sofa perfectly. Learn how to plan, build, and finish a DIY couch table that looks like a store-bought piece — without the guesswork.
START THE BUILD GUIDECouchFocus DIY Philosophy: A couch table is one of the most forgiving beginner woodworking projects. It is mostly straight cuts, simple joints, and a little patience. This guide walks you through design planning, material selection, the build itself, and the finishing steps that make a homemade table look intentional and refined.
Why Build a DIY Couch Table Instead of Buying One
A couch table — sometimes called a sofa table or console table — sits behind or beside your couch and gives you a place for lamps, books, drinks, and charging cables. Off-the-shelf options rarely match the exact length of your sofa, the height of its back, or the clearance behind it. Building your own solves those fit problems directly.
There are a few practical reasons a DIY couch table makes sense for most living rooms:
- Exact dimensions. You cut the table to the length and height your space actually allows. No awkward gaps and no overshoot into a walkway.
- Material control. You choose solid wood, plywood, or a combination that suits your room and your skill level. If you are still comparing upholstery and surface materials for the room overall, our guide to couch materials helps keep the palette consistent.
- Style matching. You can match the finish to your existing couch table setup or to a couch table with storage you already own.
- Skill building. The project uses straight cuts and simple joinery, which makes it a solid first or second woodworking project.
If your goal is a smaller accent piece rather than a full-length table, the same techniques apply. You can scale the plan down and treat it as a couch end table instead, using the same material and finish approach.
Plan Your Couch Table Before You Cut Anything
Most DIY couch table mistakes happen at the planning stage, not the build stage. Take these measurements first and write them down:
- Sofa back height. Measure from the floor to the top of the sofa back. Your table should sit level with or slightly above this point, usually adding 1 to 2 inches.
- Sofa length. Measure the full back of the sofa. Decide whether the table spans the full length or stops short at both ends for a lighter look.
- Clearance behind the sofa. Measure the gap between the sofa back and the wall. The table depth should leave enough room to reach over it comfortably — typically 10 to 16 inches.
- Walkway clearance. If the table will sit beside a walkway, keep at least 30 inches of clear floor space for traffic.
Once the dimensions are set, sketch the table from the front and the side. Mark where the legs or supports will land and decide whether you want a lower shelf. A shelf adds stability and storage, and it is a natural place to hide cables and small items.
For layout questions — such as whether the table will sit against a wall, float behind a sofa in an open plan, or double as a room divider — review our living room layout resources before finalizing the plan.
Planning tip: Use painter's tape on the floor to mark the footprint of the table. Stand behind the sofa and check that the taped outline feels right before you commit to the cut list. It takes two minutes and prevents a rebuild.
Three Build Tiers: Choose Your Skill Level
Not every couch table build needs the same complexity. The tier you choose should match your tools, your timeline, and the finish quality you want in the room.
The Simple Frame Table
Butt joints, straight cuts, and a basic sanded finish. A great starter tier for a first build. Uses dimensional lumber and a drill. Best for a quick weekend project behind a fabric sofa.
The Shelf & Storage Table
Adds a lower shelf, pocket-hole joinery, and a painted or stained finish. More stable and more useful for daily living. A balanced tier for a dedicated DIYer with a small tool collection.
The Hardwood Console
Solid hardwood, visible joinery, tapered legs, and a hand-rubbed finish. A long-term investment piece that can sit in a living room for decades. Requires more precision and more patience.
Across all tiers, the descriptor that matters most is durable construction. A table that wobbles or racks will not stay in service, no matter how good the finish looks. Reinforce the frame with a back apron or a shelf, and use glue at every joint.
Materials and Tools by Build Tier
The table below maps common materials and tools to each tier. It avoids specific product names because availability varies by region — choose local equivalents where needed.
| Component | Entry-Level | Mid-Range | Premium |
|---|---|---|---|
| Top surface | Pine or spruce board | Pine or poplar, edge-joined | Solid oak, maple, or walnut |
| Legs and frame | Dimensional lumber, butt joints | Dimensional lumber with pocket holes | Hardwood with mortise-and-tenon or dowel joinery |
| Shelf | Optional, simple board | Included, with support cleats | Included, with dado or shelf pins |
| Fasteners | Wood screws and wood glue | Pocket-hole screws and glue | Dowels, glue, and minimal hidden fasteners |
| Finish | Water-based paint or clear coat | Stain plus polyurethane | Oil finish or hand-rubbed wax |
| Key tools | Circular saw, drill, sander, clamps | Adds pocket-hole jig, speed square | Adds table saw, router, hand plane |
| Best for | First build, quick turnaround | Daily family use | Statement piece, long-term use |
Material tip: Buy kiln-dried lumber and let it sit in your home for a few days before cutting. Wood moves as it adjusts to indoor humidity, and pre-acclimating it reduces the chance of a warped top after assembly.
Recommended Couch Table Tools & Hardware for DIY Builds
⚠️ AFFILIATE DISCLOSURE: This website contains affiliate links. As an affiliate Associate, we earn from qualifying purchases. If you make a purchase through these links, we may receive a small commission at no additional cost to you. Read our full affiliate policy.

Gewudraw Narrow Console Table - 55.1" Sofa Table Behind Couch with Socket | Industrial Style, Long Skinny Design,Couch Table for Hallway,Living Room,Bedroom, Built-In Outlets & USB, 140cm Length, Brown
Check price on Amazon
Tv Tray Table, 8-Level Adjustable Height Couch Side Table,90° Tilt Angle Adjustments C-Shaped End Table, with Phone & Tablet Slot Sofa Computer Desk for Couch, Sofa, Bed, Chair, Living Room (Brown)
Check price on Amazon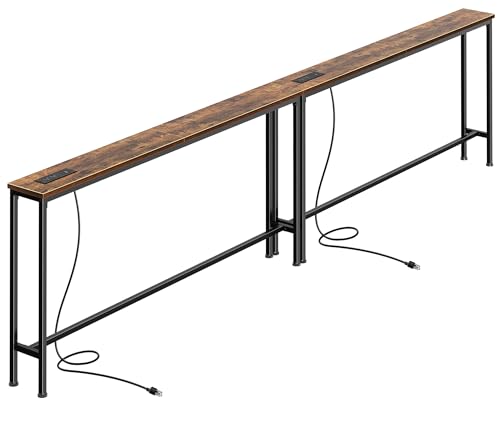
SUPERJARE 110.2 inch Narrow Behind Couch Table with Charging Stations | Power Outlet with USB-C Ports, Extra Storage Behind Sofa,Sofa Table Console Table for Entryway Living room, Rustic Brown
Check price on Amazon
Simple Trending Side Table, C Shaped End Table with Charging Station, Couch Table with Storage Bag, Adjustable Height, Rustic Brown
Check price on Amazon
ROFMAPLE Wood Furniture Legs, 6 inch Solid Wood Sofa Legs Pack of 4 Round Couch Legs Replacement Legs for Sofa Dresser Coffee Table Cabinet Bed Home DIY (6"/15cm Slant)
Check price on Amazon
Nnewvante Couch Armrest Table, 3 in 1 Acacia Wood Sofa Arm Clip-on Table | Large 15.36"X9.85" Couch Cup Holder Tray On Arm, 360°Rotating Cup & Phone Holder and Non-Slip Base,3.78inch Cup Holder
Check price on Amazon
YATINEY 78.7" Console Table with Adjustable Height (27.6"-35.4") and Power Outlet, Skinny Behind Couch Table, Narrow Long Sofa Table for Living Room, Hallway, Entryway, Black CT09UBB
Check price on Amazon
HOOBRO C Shaped End Table with Charging Station, Slide Under Couch Table | 28"H Small Side Table for Couch with Storage Bags, TV Tray Table for Sofa Arm, Recliner, Living Room, Bedroom, Rustic Brown
Check price on AmazonStep-by-Step Build Guide
The steps below describe a mid-range shelf-and-storage couch table. Entry-level builders can skip the shelf step; premium builders can substitute joinery for fasteners. The sequence is the same.
Cut and prepare the parts
Cut the top, legs, aprons, and shelf to your measured dimensions. Label each piece with painter's tape as you cut it. Sand every piece to 120 grit before assembly — it is much harder to reach tight corners once the table is built.
Assemble the leg frames
Build two identical leg frames by joining each pair of legs with top and bottom rails. Use glue plus screws or pocket-hole fasteners. Check each frame for square by measuring diagonally from corner to corner — the two measurements should match.
Connect the frames with aprons
Attach the long aprons between the two leg frames to form the base. This is the step that prevents racking. Work on a flat surface and clamp the assembly before driving fasteners. Confirm the frame sits flat with no wobble.
Install the shelf
Add support cleats inside the leg frames at your chosen shelf height, then set the shelf on top. Fasten through the cleats from below so the shelf top stays clean. This step also adds significant rigidity to the base.
Attach the tabletop
Center the top on the base and fasten it from underneath through the aprons. Use figure-eight fasteners or slotted holes if you want to allow for seasonal wood movement. Check that the overhang is even on all sides before tightening everything down.
Sand, finish, and cure
Sand the assembled table through 150 to 180 grit, easing sharp edges by hand. Apply your chosen finish in thin coats, sanding lightly between coats. Let the final coat cure fully before placing anything heavy on the table — this is the difference between a homemade look and a refined result.
Finishing Touches That Make It Look Store-Bought
The build gets the table standing, but the finishing details decide whether it looks intentional. A few small choices make a large difference:
- Ease the edges. A light chamfer or roundover on the top edge softens the table and prevents chipped corners.
- Choose one finish system. Water-based paint for a painted look, stain plus a clear topcoat for a wood look, or an oil finish for a hand-rubbed feel. Do not mix systems on the same piece.
- Add floor protection. Felt pads under the legs protect flooring and prevent the table from sliding.
- Style it deliberately. A tray, a lamp, and a small stack of books are enough. Our couch decor section has styling ideas that work for any table length.
If you plan to use the table as a functional surface every day, consider adding a couch table tray on top. A tray corrals remotes, drinks, and small items, and it protects the finish from spills.
Custom Variations Worth Building
Once the basic table is built, the same plan can be adapted for specific rooms and uses:
- Narrow rooms. Reduce the depth to 10 inches and add a slim shelf. This works well in spaces where a full-depth table would crowd the walkway.
- Open-plan living. A table with a finished back can float behind a sofa as a room divider. Keep the back face clean and painted or stained to match.
- Storage-heavy builds. Add a drawer or two under the top if you want to store small items. A couch table with storage is a natural upgrade for family rooms.
- Small-space pairs. Build two short tables instead of one long table so each side of the sofa gets its own surface. This pairs well with a couch set for small living rooms.
If you are furnishing a compact apartment, review our guides to a couch for small space with storage and a couch design for a small living room. A well-fitted couch table is often the detail that makes a small room feel finished.
Common DIY Couch Table Mistakes to Avoid
- Ignoring sofa height. A table that is too low gets hidden by the sofa back; one that is too high blocks sightlines. Measure first.
- Skipping the back apron or shelf. Without bracing, the table will rack side to side over time.
- Over-tightening pocket screws. This strips the hole and weakens the joint. Stop when the screw head seats.
- Finishing before sanding fully. Finish highlights every scratch. Sand through the grits and inspect in raking light.
- Forgetting floor protection. Felt pads take seconds to add and prevent permanent damage to hard floors.
Caring for a Wood Couch Table
A homemade table needs the same care as a store-bought one. Dust with a soft cloth, wipe spills promptly, and avoid standing water on the finish. Painted surfaces can be touched up with the same paint used on the build; stained and oiled surfaces benefit from occasional reapplication of the original finish.
For broader care guidance that applies to the whole living room, our couch protection resources cover spills, sun exposure, and daily wear.
Frequently Asked Questions
What wood is best for a DIY couch table?
Pine and poplar are good entry-level options for a first build. For a more durable, premium result, oak, maple, or walnut offer solid construction and a refined finish. Choose kiln-dried lumber to reduce warping.
How tall should a couch table be?
A couch table should sit just above or level with the back of your sofa, typically between 28 and 32 inches high. Measure your sofa back first and add 1 to 2 inches for a comfortable, functional height.
Do I need special tools to build a couch table?
A basic build requires a saw, drill, sander, measuring tape, and clamps. Advanced builds may call for a pocket-hole jig, router, or table saw. Start with a simple plan if your tool kit is limited.
How long does a DIY couch table take to build?
A simple entry-level design can be completed in a weekend. Mid-range builds with shelves or drawers typically take two to three weekends, while premium designs with joinery and a fine finish may take longer.
Can I customize the dimensions of a DIY couch table?
Yes. Couch table plans are highly adaptable. Measure the length of your sofa back, the available clearance behind it, and the height you need, then adjust the cut list accordingly. Always account for walkway clearance.
Related Guides
Ready to Build Your Own Couch Table?
Start with the tool and hardware recommendations above, then follow the build guide step by step. A custom-fit table is one of the most practical upgrades you can make to a living room.
VIEW TOOLS & HARDWARE