
Leather Repair for Couch: Complete DIY Restoration Guide
Restore scratches, cracks, tears, and peeling on your leather sofa with proven step-by-step methods, kit selection advice, and long-term prevention strategies.
START YOUR REPAIRA well-made leather couch is a long-term investment, and with proper care it can stay supple and handsome for many years. Even so, daily use leaves its mark: keys scratch the seat, a pet's claws puncture a cushion, sunlight dries the surface into fine cracks, and bonded leather eventually begins to peel. The good news is that most of these problems are fixable at home. This guide walks you through leather repair for couch owners of every experience level, from the first scratch to a fully reconditioned seat.
Before you reach for a kit, it helps to understand what kind of leather you are working with. Full-grain and top-grain leather respond beautifully to conditioning and pigment repair, while bonded leather and lower-grade splits behave differently and may need a sub-patch or professional reupholstery. The sections below explain diagnosis, tools, step-by-step repair for each damage type, aftercare, and when to call in a specialist. If you are still evaluating your current sofa or planning a replacement, you may also want to review our broader leather couch buying guide and compare options in our leather sofas collection.
Quick Start: A Safe Repair Workflow
Whether you are dealing with one small scuff or a cluster of cracks, the sequence is similar. Following a consistent order prevents you from sealing dirt into the leather or applying color over a contaminated surface.
- Clean first. Wipe the area with a mild leather cleaner and let it dry fully. Never apply repair products over dust, oil, or body lotion residue.
- Test in a hidden spot. Check color match and adhesion on the back or underside of a cushion before working on a visible seat.
- Treat the damage. Use the appropriate method for scratches, cracks, tears, or peeling as described below.
- Restore color. Blend pigment or dye to match the surrounding leather, building in thin layers.
- Condition and protect. Finish with a conditioner or protective topcoat to keep the repair supple and extend its lifespan.
Step 1: Diagnose the Damage and Leather Type
Effective repair begins with an accurate diagnosis. Two couches with similar-looking damage may need very different treatments if one is full-grain leather and the other is bonded leather.
Identify your leather type
- Full-grain and top-grain leather: Natural hide with visible pores and a soft, developing patina. Responds well to conditioners, pigment repair, and sub-patch kits.
- Corrected-grain leather: Surface has been sanded and embossed for uniformity. Pigment-based repair products work well; deep scratches may need filler.
- Bonded leather: Reconstituted leather fibers with a polyurethane coating. Peeling is common and repairs are temporary; plan for replacement over the long term.
- Faux or synthetic leather: Vinyl or polyurethane. Use repair kits specifically labeled for synthetic leather to avoid adhesion failure.
Match the method to the damage
| Damage Type | Typical Cause | Best Approach |
|---|---|---|
| Light scratches | Keys, zippers, pet claws | Conditioner, color balm, or light pigment touch-up |
| Surface cracks | Dryness, sun exposure, age | Leather filler plus flexible color coat |
| Tears and punctures | Sharp objects, pet bites | Sub-patch kit with adhesive and filler |
| Peeling coating | Bonded leather degradation, abrasion | Trim, seal, and recolor; consider replacement for severe cases |
| Fading or discoloration | Sunlight, friction, cleaning residue | Leather dye or pigment restoration |
If you are unsure whether the surface is genuine leather or a synthetic coating, check a hidden seam or the underside of the couch. Genuine leather has a fibrous back and a natural grain; bonded leather often shows a uniform, plasticky surface with a fabric backing.
Step 2: Gather the Right Tools and Kits
You do not need a professional workshop to handle most home repairs, but the quality of your kit matters. A dedicated leather repair kit typically includes filler, adhesive, sub-patch material, color pigment, and applicators. For a full restoration you may also want a leather conditioner and a protective topcoat.
What to look for in a kit
- Color-matching capability: Kits that let you mix or blend pigments to match your couch give more seamless results than single-shade kits.
- Flexible filler: Rigid fillers crack when the cushion flexes; choose a flexible leather filler designed for upholstery.
- Adhesive strength: A good sub-patch adhesive should bond securely without stiffening the surrounding leather.
- Applicator variety: Spatulas, sponges, and fine brushes all help with different damage types.
| Tier | Category | Best For |
|---|---|---|
| Essential tier | Basic scratch and scuff kits | Light surface marks, small color touch-ups |
| Balanced tier | Multi-part repair kits | Cracks, small tears, and fading on high-traffic seats |
| Top-tier | Professional-grade restoration kits | Large tears, extensive peeling, full cushion color restoration |
If your goal is color restoration rather than structural repair, a dedicated leather dye for couch product may be more appropriate than a general repair kit. For targeted restoration after cleaning, a leather restorer for couch can help revive faded and dry surfaces before you begin structural work.
Step 3: Repairing Scratches on Leather
Light scratches that do not break the surface are the easiest to fix and often disappear with a good conditioner. Deeper scratches that expose a lighter color underneath need pigment touch-up.
For light surface scratches
- Clean the area with a leather cleaner and let it dry.
- Apply a small amount of leather conditioner with a soft cloth, working in circles.
- Let it absorb for 15–20 minutes, then buff off any excess with a dry cloth.
- Repeat if the scratch is still visible after the first application.
For deeper scratches
- Clean and dry the area fully.
- Apply a leather filler or heavy-bodied pigment to the scratch with a fine brush or spatula.
- Build in thin layers rather than one thick coat, letting each layer dry.
- Blend the color with a color balm or pigment matched to your leather.
- Finish with a protective topcoat and condition the surrounding area.
On seats that receive heavy traffic, a leather couch cushion cover or a rotation strategy can reduce repeated scratching in the same spot.
Step 4: Fixing Cracks in Leather Upholstery
Cracks usually signal dryness and surface fatigue. They deepen over time if left untreated, eventually turning into open splits. Early intervention with filler and conditioning prevents that progression.
- Clean the cracked area thoroughly with a mild leather cleaner.
- Use a soft brush or your fingertip to work flexible leather filler into the cracks.
- Wipe away excess filler with a damp cloth while it is still workable.
- Allow the filler to cure fully according to the product instructions.
- Lightly sand with fine-grit paper if the repair feels raised, then wipe clean.
- Apply a color-matched pigment or balm to blend the repair into the surrounding leather.
- Condition the whole cushion to restore suppleness and prevent new cracks.
Step 5: Repairing Tears and Punctures
Tears and punctures are the most common reason people search for leather repair guidance. A sub-patch kit is the standard solution: a thin material is inserted beneath the tear to support the repair, and then filler and color restore the surface.
Sub-patch method for a clean tear
- Clean the area and trim any loose fibers carefully with small scissors.
- Cut a sub-patch slightly larger than the tear from the kit material.
- Apply adhesive to the sub-patch and slide it beneath the tear using a spatula or tweezers.
- Press the edges of the tear together over the patch and hold until the adhesive sets.
- Apply leather filler over the seam in thin layers, letting each layer dry.
- Sand lightly between layers if needed, then clean away dust.
- Apply color-matched pigment and blend the edges outward.
- Finish with a protective topcoat and condition the area.
Punctures from pet claws or sharp objects
Small round punctures can sometimes be closed by working a tiny amount of adhesive into the hole and pressing the edges together, followed by filler and color touch-up. If the puncture is larger than a pencil eraser or sits on a load-bearing seat, use a sub-patch for durability.
For a larger sectional with repeated damage in one zone, it may be worth considering a leather sectional with chaise and ottoman configuration that distributes wear more evenly, or adding a leather sectional with oversized ottoman to redirect heavy use away from the most damaged section.
Step 6: Dealing with Peeling Leather
Peeling is the toughest repair category because it usually indicates the top coating has failed. Bonded leather and lower-grade splits are most prone to this. The goal of repair is to stabilize the area, prevent further peeling, and restore appearance—though replacement may be the more durable long-term choice for severe cases.
- Clean the area and gently trim away any loose, flaking pieces.
- Apply a leather adhesive under the remaining edge and press it down.
- Fill any gaps with flexible leather filler in thin layers.
- Sand lightly once cured, then clean away dust.
- Apply a color-matched pigment or leather paint to restore the surface.
- Seal with a flexible protective topcoat designed for upholstery.
If peeling is widespread across multiple cushions, repairs will likely be temporary. In that scenario, reviewing leather couch removable cushions or a replacement configuration may be more practical than repeated patchwork. For smaller rooms or apartments where the couch is used less intensively, a leather couch for small living room can be easier to maintain and replace over time.
Step 7: Color Restoration and Blending
Once structural repairs are complete, color restoration is what makes the work disappear. Pigment-based products are generally more forgiving for beginners than dyes, because you can build coverage in thin layers and blend edges.
Blending technique
- Start with a color slightly lighter than the target and build toward the match.
- Use a small sponge or fine brush and work from the center of the repair outward.
- Feather the edges into the surrounding leather rather than creating a hard line.
- Let each layer dry before evaluating the match; wet pigment looks darker.
- Finish with a protective topcoat to lock in the color and add durability.
For a full cushion refresh rather than a spot repair, a leather dye for couch product or a leather restorer for couch treatment can unify the color across a larger area. If you plan to re-cover rather than restore, our leather couch removable cushions guide covers replacement options and fit considerations.
Step 8: Aftercare and Prevention
A successful repair lasts longer when the surrounding leather is healthy. Conditioning is the single most effective maintenance habit for leather upholstery, followed by sun protection and prompt spill cleanup.
Maintenance routine
- Clean: Wipe with a mild leather cleaner every few weeks, or immediately after spills.
- Condition: Apply a leather conditioner every 3–6 months, more often in dry climates or sunny rooms.
- Protect: Keep the couch out of direct sunlight and use curtains or blinds during peak hours.
- Rotate: Rotate and flip removable cushions where possible to distribute wear.
- Address damage early: A scratch treated today is less likely to become a crack next year.
For broader living-room care and styling guidance, our living room essentials and living room decor guides pair well with this repair routine. If you are refreshing the whole room after a restoration, leather couch living room inspiration can help you coordinate surrounding pieces.
When Professional Leather Repair Is the Better Choice
DIY repair handles most surface and moderate damage well, but some situations warrant a professional upholsterer or leather specialist.
- Structural frame damage: A sagging or broken frame is a furniture repair issue, not a surface repair.
- Large tears across load-bearing seams: Seam reconstruction requires specialized equipment and technique.
- Extensive peeling on bonded leather: Replacement or reupholstery is usually more durable than repeated patching.
- Antique or high-value leather: Conservation-grade care protects both appearance and resale considerations.
- Warranty coverage: Check whether your couch is still under warranty before attempting a repair that could void coverage.
If you are weighing repair against replacement, comparing configurations such as a leather couch with chaise and ottoman or a leather sectional with chaise and recliner can help you decide whether a new piece better fits your room and lifestyle. Our leather couches for sale collection and leather couch buying guide are useful starting points for that evaluation.
Recommended Leather Repair Kits & Products
⚠️ AFFILIATE DISCLOSURE: This website contains affiliate links. As an affiliate Associate, we earn from qualifying purchases. If you make a purchase through these links, we may receive a small commission at no additional cost to you. Read our full affiliate policy.

Leather & Vinyl Repair Kit for Furniture, Car Seats & Couches, 10 Colors | Leather Repair Kit with 10 Mixable Colors for Car Seats, Couches & Furniture – Fix Tears, Cracks, Scratches, Holes & Peeling
Check price on Amazon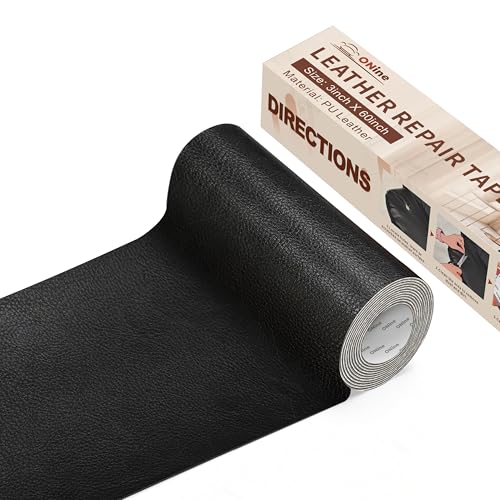
ONine Leather Repair Tape,Self Adhesive Leather Repair Patch,Leather Patches for Furniture,Sofa,Car Seats,Office Chair. Vinyl Repair Kit 3x60in (Black)
Check price on Amazon
FORTIVO Leather Recoloring Balm, Leather Color Restorer, Scratch Remover, Couch Paint and Repair, Leather Balm for Couches - Dark Brown
Check price on Amazon
Brown Leather Repair Kit for Furniture & Couches, Car Seat Vinyl Repair Kit | Leather Couch Repair Kit, Faux Leather Repair Kit & Vinyl Repair; Fixes Scratches, Cracks, Tears & Peeling; Any Brown Shade
Check price on Amazon
Black Leather Repair Kit for Furniture, Leather Seat Repair Kit for Cars, Easily Restore Car Interior, Sofa, Purse and Jacket, Restore Any Material with Super Easy Instructions
Check price on Amazon
FITTDYHE Fabric Glue Permanent, 60 ML Washable Clear Clothing Glue, Super Fabric Glue for Rhinestones, Patches, Clothes, Denim, Leather, Polyester, Fabrics, Doll Repair, Flannel, Cotton
Check price on Amazon
Besezx Leather Repair Patch Tape Kit, Self Adhesive Leather Repair for Furniture, Couch, Sofa, Car Seats,Office Chair,Vinyl Repair Kit.30inx16in
Check price on Amazon
COCONIX Black Leather & Vinyl Repair Kit for Car Seats, Couches & Furniture | Black leather repair, vinyl seat repair, car interiors, couches, furniture, tears, holes, scratches, peeling, jackets & shoes
Check price on AmazonFrequently Asked Questions
Can I repair a leather couch myself?
Yes. Most minor issues—scratches, small tears, surface cracks, and fading—can be handled with a DIY leather repair kit. Deep structural damage, large seam failures, or extensive peeling on bonded leather are better assessed by a professional.
How do I prevent leather couch peeling?
Keep the couch out of direct sunlight, clean spills promptly, and condition the leather every 3–6 months. Bonded leather will eventually degrade regardless of care, but consistent conditioning significantly slows the process.
What is the best leather repair kit for a couch?
Choose based on damage type: sub-patch kits for tears, flexible filler for cracks, and color-matching kits for scratches and fading. A multi-part kit with color blending capability gives the most versatile results for a home repair.
Can I use leather dye on a repaired area?
Yes, but apply dye only after structural repairs have cured and been cleaned. Dye over an uneven filler layer can highlight the repair rather than hide it. A pigment-based product with blending is often more forgiving on upholstery.
How long does a leather repair last?
A well-executed repair on quality leather with proper aftercare can last for years. Repairs on bonded leather or heavily worn seats may be more temporary and should be evaluated periodically.
Should I repair or replace a peeling leather couch?
If peeling is limited to one small area, repair is reasonable. If multiple cushions are peeling or the coating is failing broadly, replacement is usually the more durable option. Compare the cost of repair and reupholstery against a new configuration that fits your room.
Ready to Restore Your Leather Couch?
Start with a quick clean, assess the damage, and choose the method that matches your leather type. Browse our recommended repair kits above to find the right supplies for your project.
EXPLORE REPAIR KITS