
Painting a Leather Couch: The Complete Guide
Transform your worn or outdated leather sofa with a fresh coat of color. This comprehensive guide covers everything from choosing the right paint to applying a durable, professional finish that lasts.
In This Guide
Why Paint a Leather Couch?
Leather furniture is a long-term investment, and over time even the most durable pieces can show signs of wear. Fading, cracking, peeling, or simply a color that no longer matches your interior design can make a leather couch feel ready for replacement. Painting your leather couch offers a practical alternative to buying new furniture, and it comes with several compelling benefits.
Restore Worn or Faded Leather
Sun exposure, body oils, and daily use can cause leather to fade unevenly. A fresh coat of leather paint restores rich, uniform color and can conceal minor scratches, scuffs, and discoloration. This makes painting an effective way to extend the usable life of your furniture.
Update Your Interior Style
Perhaps your leather couch is structurally sound but the color no longer suits your living room. Whether you are moving to a new home, redecorating, or simply want a change, painting allows you to shift from a dated tone to a modern shade that complements your space.
A Sustainable Alternative
Refinishing existing furniture keeps it out of landfills and reduces demand for new manufacturing. If you are conscious of environmental impact, painting a leather couch is a responsible choice that gives your furniture a second life.
Good to know: Painting works best on smooth, finished leather. Suede, nubuck, and heavily distressed aniline leathers require different treatment and are not ideal candidates for standard leather paint.
Paint vs. Dye: Which Is Right for You?
Before you begin, it is important to understand the difference between leather paint and leather dye. Both can change the color of your couch, but they work differently and suit different situations.
| Feature | Leather Paint | Leather Dye |
|---|---|---|
| Coverage | Opaque; covers existing color completely | Translucent; enhances or deepens existing color |
| Best For | Significant color changes, covering damage | Refreshing faded leather, subtle color shifts |
| Application | Applied on the surface, builds in layers | Absorbed into the leather |
| Finish Options | Matte, satin, or glossy top coats available | Natural leather finish preserved |
| Skill Level | Beginner-friendly with proper preparation | Requires experience for even results |
| Durability | Durable with protective top coat | Excellent when properly absorbed |
For most DIY homeowners, leather paint is the more accessible option. It provides predictable results, covers imperfections, and is forgiving during application. Dye is better suited to professional refinishing or situations where you want to deepen the existing color without changing it entirely.
If you are also considering a fabric couch makeover, you may want to review our broader guide to painting a couch for comparison and additional context.
Materials and Tools You Will Need
Gathering the right supplies before you start is essential for a smooth process and a lasting result. Here is what you will need for painting a leather couch.
Essential Supplies
- Leather paint formulated specifically for upholstery (acrylic-based, flexible when dry)
- Leather preparer or degreaser to remove oils and residue
- Leather filler or repair compound for cracks and deep scratches
- Fine-grit sandpaper (around 400 to 600 grit) for light surface smoothing
- Soft lint-free cloths or microfiber towels for cleaning and wiping
- Foam brushes or high-density paint sponges for even application
- Painter's tape to protect legs, stitching, and hardware
- Protective top coat or leather finisher to seal the paint
- Drop cloths to protect your floor and surrounding furniture
- Nitrile gloves to keep paint off your hands
Optional but Helpful
- Airbrush or spray gun for a factory-like finish on large surfaces
- Hair dryer on cool setting to speed drying between coats
- Tack cloth to remove dust before painting
Important: Never use standard wall paint, latex paint, or craft acrylics not formulated for leather. These products do not flex with the material and will crack, peel, or flake within weeks of application.
Step-by-Step Preparation
Preparation is the single most important factor in the success of painting a leather couch. Skipping steps here leads to peeling, uneven color, and premature wear. Take your time with each stage.
- Clean the Couch Thoroughly Use a leather preparer or a mild degreasing solution to remove body oils, lotions, and surface grime. Pay special attention to armrests, headrests, and seat cushions where oils accumulate. Wipe down with a clean damp cloth and allow to dry completely.
- Repair Damage Fill cracks, tears, and deep scratches with a leather repair compound. Apply in thin layers, allowing each layer to dry before adding the next. Sand smooth once fully cured so the repair blends with the surrounding surface.
- Lightly Sand the Surface Use fine-grit sandpaper to gently scuff the leather. This creates a textured surface that helps the paint adhere. Do not sand aggressively, as this can damage the leather grain. Wipe away dust with a tack cloth.
- Deglaze and Wipe Down Apply a leather degreaser or rubbing alcohol to a soft cloth and wipe the entire surface. This removes any remaining oils and residues. Allow the couch to dry completely before moving to the next step.
- Tape Off Protected Areas Use painter's tape to cover wooden legs, metal hardware, and any fabric accents. If you want to preserve the original stitching color, you can tape over the seams, though most leather paints can be applied over stitching.
Pro tip: Work in a well-ventilated space with a consistent temperature. Avoid painting in direct sunlight or high humidity, as these conditions affect drying time and adhesion.
Applying the Paint
With preparation complete, you are ready to apply the leather paint. The key to a professional finish is thin, even coats rather than heavy layers.
Step 1: Apply the First Coat
Using a foam brush or paint sponge, apply a thin, even layer of leather paint. Work in small sections, using smooth, overlapping strokes. Do not press too hard, as this can push paint into seams unevenly. A light first coat may look patchy, which is normal.
Step 2: Allow to Dry
Let the first coat dry according to the manufacturer's instructions, typically one to two hours. If you are using a hair dryer, keep it on a cool or low-heat setting and maintain a safe distance to avoid overheating the leather.
Step 3: Apply Additional Coats
Apply a second and, if needed, a third coat. Each coat should be thin. Two to three coats are usually sufficient for full coverage, though a dramatic color change, such as dark brown to white, may require additional layers. Lightly sand between coats if you notice any texture imperfections, then wipe away dust.
Step 4: Apply a Protective Top Coat
Once the final paint coat is fully cured, apply a leather finisher or protective top coat. This seals the paint, adds durability, and gives the surface a matte, satin, or glossy finish depending on your preference. Follow the product directions for application and drying times.
Timing tip: Allow the painted couch to cure for at least 24 to 48 hours before using it. Full cure can take up to a week. During this period, avoid placing heavy items or sharp objects on the surface.
Aftercare and Protection
Proper care after painting extends the life of your finish and keeps the leather looking its best. Follow these simple habits to maintain your newly painted couch.
Cleaning Routine
Dust the surface weekly with a soft dry cloth. For deeper cleaning, use a leather-safe cleaner designed for painted or finished leather. Avoid abrasive cleaners, bleach, or alcohol-based products, which can degrade the top coat over time.
Protect from Sunlight
Direct sunlight can cause paint to fade and leather to dry out. Position your couch away from prolonged direct sun or use window treatments to filter UV rays. This is especially important in rooms with large windows or glass doors.
Address Spills Quickly
Blot spills immediately with a clean, dry cloth. Do not rub, as this can spread the spill or damage the finish. For sticky or oily spills, use a damp cloth with a small amount of leather-safe cleaner, then dry thoroughly.
Consider Conditioning
After the paint has fully cured, applying a leather conditioner formulated for painted leather can help maintain flexibility and prevent cracking. Apply sparingly and buff off any excess.
Avoid: Sharp objects, pet claws, and abrasive fabrics can scratch the painted surface. If you have pets, consider a scratch-resistant top coat or use a throw blanket on seating areas they frequently use.
Common Mistakes to Avoid
Even well-intentioned DIY projects can go wrong if certain pitfalls are not avoided. Here are the most common mistakes people make when painting a leather couch.
- Skipping surface preparation. Painting over oils and dirt causes the paint to peel within weeks. Always clean and degrease thoroughly.
- Using the wrong paint. Standard acrylics and latex paints are not flexible enough for leather and will crack. Use leather-specific paint only.
- Applying thick coats. Heavy coats take longer to dry, are more prone to cracking, and can obscure the leather grain. Thin, even layers are always better.
- Rushing the drying process. Applying the next coat before the previous one has dried properly can cause lifting and uneven texture.
- Neglecting the top coat. Without a protective finisher, the paint will wear quickly, especially on high-contact areas like seat cushions and armrests.
- Painting in poor conditions. High humidity, extreme cold, or direct sunlight can interfere with adhesion and drying. Choose a moderate, well-ventilated space.
If your leather has severe damage such as large tears or missing sections, painting alone may not be enough. In those cases, combining painting with patching a leather couch can restore both structure and appearance.
Frequently Asked Questions
Ready to Refresh Your Leather Couch?
Explore our curated selection of leather paints, preparers, and protective top coats to get started on your couch makeover today.
View Recommended ProductsRecommended Products for Painting a Leather Couch
⚠️ AFFILIATE DISCLOSURE: This website contains affiliate links. As an affiliate Associate, we earn from qualifying purchases. If you make a purchase through these links, we may receive a small commission at no additional cost to you. Read our full affiliate policy.

FORTIVO Leather Recoloring Balm, Leather Color Restorer, Scratch Remover, Couch Paint and Repair, Leather Balm for Couches - Dark Brown
Check price on Amazon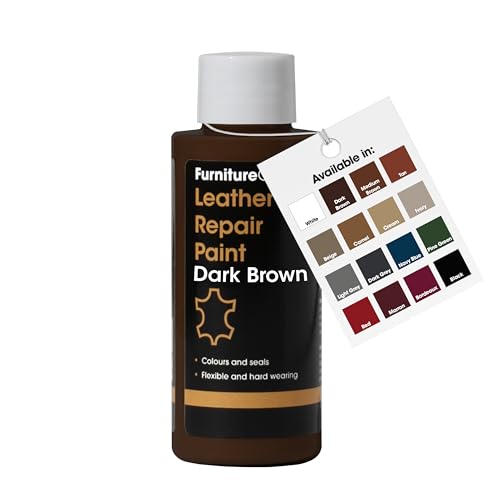
Furniture Clinic Leather Repair Paint, Color and Finish, Dark Brown | This 1.7 oz bottle of 2-in-1 formula dries flexible & repairs scratched & faded leather sofas, car seats handbags & more.
Check price on Amazon
FORTIVO Leather Recoloring Balm, Color Restorer, Scratch Remover, Couch Paint and Repair, Leather Balm for Couches
Check price on Amazon
Angelus Acrylic Leather Paint, Dark Brown | Flexible Recoloring Balm for Shoes, Furniture, Car Seats & More | Made in USA, 4 fl oz
Check price on Amazon
STARTSO WORLD Leather Recoloring Balm, Dark Brown Leather Repair Kit for Furniture, Leather Dye, Leather Color Restorer for Couches, Leather Couch Paint | Repair, Restore Faded & Scratched Leather
Check price on Amazon