
Repairing a Leather Couch: The Complete Guide
From minor scratches to deep cracks — learn how to restore your leather sofa like a pro.
Shop Leather Repair KitsLeather couches are an investment. With the right care and repair techniques, you can extend their life by years. Whether you’re dealing with surface scratches, scuffs, faded color, or structural issues, this guide covers every aspect of repairing a leather couch. We’ll walk you through DIY solutions, professional services, and the best products to keep your leather looking luxurious.
1. Identify the Type of Leather Damage
Before you start repairing a leather couch, you need to know what you’re dealing with. Different damages require different approaches.
- Scratches & Scuffs: Surface-level marks from pets, keys, or clothing.
- Cracks & Creases: Often caused by dryness and aging — common on arms and seat cushions.
- Fading & Discoloration: Sun exposure or improper cleaning can dull the color.
- Stains: Oil, ink, food, or water marks that penetrate the finish.
- Peeling & Flaking: Usually seen on bonded or faux leather, but can happen to genuine leather if the protective topcoat wears off.
Once you’ve identified the damage, you can choose the right repair method. For deeper structural issues like sagging cushions or broken springs, consider professional help. Learn more about repairing a sagging couch with non-removable cushions if your couch has support problems.
2. DIY Leather Repair: Kits, Fillers & Compounds
For minor to moderate damage, DIY repair kits are highly effective. They typically include a leather filler compound, colorant, and applicator tools. Here’s what to look for:
- Leather Filler: For cracks and deep scratches. Apply in thin layers, let dry, then sand smooth.
- Color Matching: Many kits allow you to mix pigments to match your couch’s exact shade.
- Finishing Coat: Protects the repaired area and restores the original sheen (matte, satin, or gloss).
- Cleaning & Prep: Always clean the area thoroughly before applying any repair product.
Popular brands include Leather Repair Kits by LeatherMedic, Furniture Clinic, and Rub ‘n Restore. These kits are perfect for leather cleaning and maintenance after repair.
3. Step-by-Step Guide: How to Repair a Leather Couch
Follow these steps for a professional-looking repair at home.
- Clean the area – Use a mild leather cleaner or a mix of water and dish soap. Gently scrub with a soft cloth and let it dry completely.
- Sand the edges – For cracks or peeling, use fine-grit sandpaper (800–1200 grit) to smooth the edges of the damaged area.
- Apply leather filler – Use a palette knife to apply the filler, building it up slightly above the surface. Let it dry (follow kit instructions).
- Sand again – Once dry, sand it down to be level with the surrounding leather.
- Apply colorant – Use a sponge or airbrush to apply the matching color in thin layers. Blend outward for a seamless look.
- Apply topcoat – Finish with a protective sealant to match the original sheen. Let it cure for 24–48 hours.
- Condition – After the repair is fully cured, apply a high-quality leather conditioner to keep the leather supple.
For deeper scratches or damage that penetrates the leather, you may need to use a leather repair compound with a heat-curing process. If your couch has a leather reclining living room set, pay extra attention to the moving parts and seams.
4. DIY vs. Professional Repair: Which Is Right for You?
Deciding whether to tackle the repair yourself or hire a professional depends on the severity of the damage and your budget.
- DIY is suitable for: Minor scratches, scuffs, small cracks, fading, and color touch-ups. It's cost-effective and can be done in a weekend.
- Professional repair is better for: Large tears, structural damage, extensive cracking, or if the leather is very delicate. Professionals also offer color matching services that are almost flawless.
If your couch is antique or a high-end designer piece, professional upholstery repair is often recommended. For standard leather sofas, DIY kits work wonders.
5. Preventative Care: Keep Your Leather Couch Looking New
Once you've finished repairing a leather couch, proper maintenance will prevent future damage. Regular care extends the life of your leather and reduces the need for major repairs.
- Condition every 6–12 months – Use a high-quality leather conditioner to maintain moisture and prevent cracking.
- Clean spills immediately – Blot (don’t rub) with a clean cloth. Avoid harsh chemicals.
- Keep out of direct sunlight – UV rays fade and dry out leather. Use curtains or blinds.
- Vacuum regularly – Remove dust and debris that can abrade the surface.
- Use leather protectants – Especially if you have pets or kids.
If you have other leather furniture, you might also be interested in leather accent chairs set of 2 or leather sectional for small living room — they all benefit from the same care routine.
6. Replace or Repair? Making the Right Decision
Sometimes it's more economical to replace rather than repair. Here’s how to decide:
- Repair if: The couch is structurally sound, the damage is cosmetic, and the cost of repair is less than 50% of a new couch.
- Replace if: The frame is broken, the cushions are beyond fluffing, or the leather is severely worn in multiple areas.
- Also consider the age of your couch. A 10+ year old couch may not be worth a $600 repair if you’re planning to upgrade soon.
If you decide to replace, explore our guide on leather couches for sale to find the perfect new piece.
Top Leather Repair Kits & Accessories
⚠️ AFFILIATE DISCLOSURE: This website contains affiliate links. As an affiliate Associate, we earn from qualifying purchases. If you make a purchase through these links, we may receive a small commission at no additional cost to you. Read our full affiliate policy.

ONine Leather Repair Patch,Leather Repair Tape, 3 x 60 inches Leather Repair Patch for Furniture,Vinyl Repair Kit,Leather Couch Patch,for Sofas, Furniture, Car Seats, Office Chairs(Dark Brown)

Brown Leather Repair Kit for Furniture & Couches, Car Seat Vinyl Repair Kit

Besezx Leather Repair Patch Tape Kit, Self Adhesive Leather Repair for Furniture, Couch, Sofa, Car Seats,Office Chair,Vinyl Repair Kit.30inx16in

Leather & Vinyl Repair Kit for Furniture, Car Seats & Couches, 10 Colors

FORTIVO Leather Recoloring Balm, Leather Color Restorer, Scratch Remover, Couch Paint and Repair, Leather Balm for Couches - Dark Brown
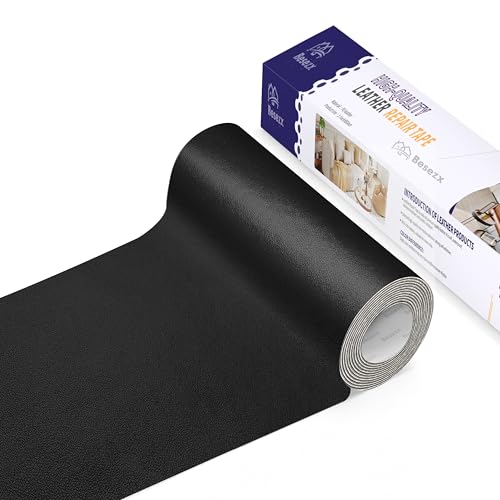
Besezx Leather Repair Patch Tape Kit,Vinyl Repair Kit,Self Adhesive Leather Repair for Furniture, Couch, Sofa, Car Seats,Office Chair.3.1inx60in-Black

BSZHTECH Leather Repair Tape Self-Adhesive Leather Repair Patch for Couch Furniture Sofas Car Seats Advanced PU Vinyl Leather Repair Kit (Dark Brown, 3.9X79 inch)

Angelus Leather Filler for Filling or Repairing Holes, Tears, Cracks, Scratches, for Leather Car Seats, Furniture, Shoes - Flexible | Made in USA - 2 fl oz
Frequently Asked Questions About Leather Couch Repair
Can I repair a deep scratch on my leather couch myself?
Yes, using a leather filler and colorant kit. For deep scratches, build up the filler in layers and sand smooth before coloring. If the scratch goes through the leather, you may need a patch or professional help.
How much does it cost to professionally repair a leather couch?
Professional repair costs range from $120–$600 for spot repairs, and $800+ for full restoration. Prices depend on the extent of the damage and your location.
What is the best leather conditioner for repair maintenance?
We recommend products with lanolin or neatsfoot oil. Brands like Leather Honey and Bickmore are excellent. Always test on a small area first.
Can I use olive oil or coconut oil to condition my leather couch?
No. Household oils can go rancid and damage leather. Always use products designed specifically for leather furniture.